keskiviikko 27. heinäkuuta 2011

Fireworks and flowers

Here I used a purple matt nail polish and did a french manicure with a red/pink colour. I think is looked cool since the purple was matt and the pink/red was shiny, it bought a nice contrast :D
 I then used BM 02 for the fireworks spiral thingys and 03 for the hearts and flowers. I also added a small stud to the center of a flower.
 Here's after I added top coat, I couldn't really decide whether to go with a normal or matt top coat but I chose the normal in the end, luckily the purple still stayed looking a bit matt. Only problem here was that I once again added the top coat too early and managed to smudge the images haha :D


Grey/pink leopard print

Hey sorry I haven't posted for a while, it's been a bit busy the last few days :D
So after doing the leopard print nails for my sister I did ones for myself. In generally I liked them but first of all the grey was a bit too dark, a lighter colour would've helped the black stand out better, and I also messed up the right hand pretty bad :D
So this is how I started off, I didn't want to just go with the norm where the base colour is the same on each finger so I switched it up a bit ;D
 Here's what they looked like after I added the dots
 And here's after I added the black
 Yeah this hand looks pretty awful, I know
 I also added a little glitter on top, using just a normal glitter nail polish by Anytime

lauantai 16. heinäkuuta 2011

Orange and yellow leopard print - for my lil sis

So my sister went off to her confirmation camp for a week and she finally let me do her nails hahah :D So I did a leopard print design for her, letting her choose the colours herself. Now doing a leopard print design is fairly easy and simple, it just takes some time. I started off by using yellow for every other nail and orange for the others, fairly obvious :D I used to do my leopard print designs so that I started off with the black rings and then the colour in the center, but this time  started off with splodges of colour and then did the rings. I don't really notice and difference in the outcome, I think both methods are just as good, though many prefer doing the colour splodges first :D

 And this is after I outlined the colour dots. There's really no rule to this, I just basically drew random lines, rings and dots around the colour dots, just making it up as I went along :D

Classy glitter

So this is a very basic design, but I really liked it, it looks classy and.... well mature I guess :D so these nail would go very well to any kind of fancy party. I stated off with light pink and only used one coat, but two would have been better. See in the beginning I was intending to do a glitter gradient and started by a light layer of glitter nail polish in the middle and I was going to build it up from there, but I liked how it looked like this and left it at that :P
 I added a nail ring since I still have the hole I drilled and it suited the look. :)

keskiviikko 13. heinäkuuta 2011

Just your basic sponging - blue

So here's just  a sort of step-by-step on sponging and how I personally did it. I was later supposed to add on some designs but I left it and couldn't really bother later on anymore :D
So basically I started by sponging on a layer of light blue nail polish.
 I then sponged on some dark blue.
 I then added another layer of the dark blue to the tip to strengthen the dark blue to help create the gradient effect. (Which didn't really come out the best but I'm working on it ;P)
 I then just added some shimmery top coat! :)

perjantai 8. heinäkuuta 2011

New nail polishes, stickers, glitter and nail rings!

So here's a pic of some new stuff i bought :) And the fake nails were ridiculously cheap, only 75 cents!
Here I tried out the new light blue and green nail polishes as well as added the stickers i bought :)

 I also bought nail rings! Yay, since I haven't found any here in Finland I'm really happy to have found some in Spain.


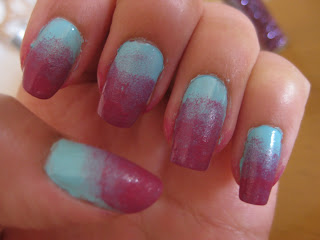
 This design was really random, I just made it up as I went along :D starting with a light blue nail polish underneath I used a make up sponge to sponge on a few layers of a pink/purple nail polish I also ought. I basically just made a few layers, the first one going the farthest and then adding shorter layers on top to build up the gradient effect. It looks no way near perfect but I don't really mind :D
 I then added nail stickers which I had left over and purple glitter on the tips of my nails. Though the colouring was a bit funny I think these turned out pretty nice :)

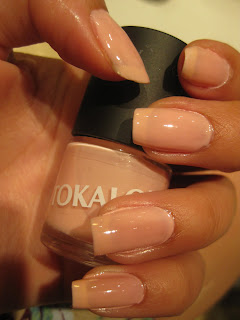
 This is another nail polish I bought and i really loved the colour!
 Here I just did a basic french manicure on top of the pink nail polish in the pitcure above. Sorry for the fourth nail looking so horrid! The nail polish hadn't dried properly and I tried to add a nail ring and I just managed to mess up the whole tip :D
 Right so here's a few more colour I bought, the only thing is that I also bought a matte top coat, with basically should mattify the nail polish underneath. The only problem: It didn't! It only mattified ONE of my nails and I have no idea why :D I guess I'll try again and hope for the best!

Rest of the nail foils!

So as you may have noticed I haven't been here for a while because I went on a vacation to Spain so now i'm posting all the different nails I did when I was abroad, the all the nail foil tried will be here and the others in a post I'll write up next :)
So first up: Fuchsia fantasy
It turned out more purple than i'd expected, though that may be because I put purple nail polish underneath in order to help hide any imperfections, since it's hard to get the nail foil to stick perfectly :D

 This one's called Rainbow Drops and look like drops of oil on a silver surface, and I think it looks pretty cool, the only problem with this was that it wears off pretty quickly, and putting a top coat on it makes it crinkle very easily. It was the same with the silver and gold ones. So I'd only use them at parties or special occasions where you only need them to last the evening.


 This was definitely my favourite! The pattern is really pretty plus you can put top coat on it without it wrinkling. Mine lasted easily for nearly a week, after which I took them off, so they'd probably last very long for people who don't change their nail polishes very often. The only thing is that you need to apply a white nail polish underneath because the white is very sheer and see through, so anything underneath will be seen through. But I really loved these nails, the pattern is the best, plus, they're the easiest to apply! :)

 This foil (Florentine Marble) is pretty much like the gold, silver and rainbow drops; it wears off easily and crinkles when the top coat is applied. Though the crinkling doesn't show that much because you can't see it on the black parts so I guess it doesn't look that bad :P

 Here's a foil just called Gold, which is pretty much what it is (duh) :D Here you can see how the top coat crinkles the foil, before it was mostly smooth, but after the top coat it just pretty much looks a mess :/

 The last one is Silver Spectrum, which I took a picture of without and top coat on it, you can see that it's much smoother than the gold nail foil with the top coat on.
 But, as I said, it wears off very easily, this is what they looked like the next day :D (and don't worry, my nails aren't that yellow, that's just the adhesive on the tips of my nails)